
CONSTRUIR NATIVO
APLICACIONES IOS Y ANDROID
EN MINUTOS
SIN CODIFICACION
Destaca con una aplicación profesional.
Con Appily App Builder, puede convertir cualquier idea en realidad.
Offer mobile apps as a new service to your clients
Launch apps in days with our no-code platform
Generate recurring revenue under your own brand
Trusted by agencies, entrepreneurs, and digital businesses worldwide.
Powering 18,825+ apps built and launched on our white label platform
Used by entrepreneurs, agencies, and resellers worldwide
SU NEGOCIO, IMPULSADO POR NUESTRA TECNOLOGÍA
Cree aplicaciones para publicar en APPLE App Store y Google Play STORE


Usted construye su negocio, nosotros manejamos su aplicación.
La mayoría de la gente no se da cuenta de lo mucho que sucede detrás de escena de una aplicación móvil que funciona bien. Cuando creas una aplicación desde cero, hay cientos de partes que debes considerar. Afortunadamente para usted, Appily App Builder se encarga de todo el trabajo pesado por usted para que pueda concentrarse en lo que más le importa, su negocio.

Cree aplicaciones para publicar en APPLE App Store y Google Play STORE
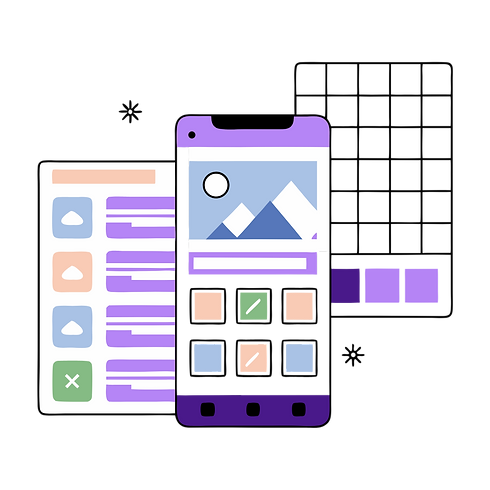
Entregue la próxima generación de aplicaciones
Entregue la próxima generación de aplicaciones
La plataforma Appily App Builder pone tecnología de vanguardia a su alcance, brindándole formas ilimitadas de llevar aplicaciones increíbles a usuarios de todo el mundo. Appily App Builder está diseñado desde cero para que pueda crear experiencias intuitivas y multifacéticas que son realmente perfectas.
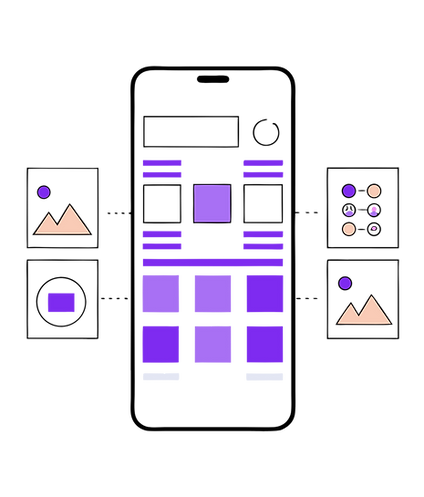
Paso 1. Elija un diseño de diseño
Personalícelo para que se adapte a sus necesidades
Paso 2. Agregue las funciones que desee
Cree una aplicación que refleje la imagen adecuada para su negocio
Empújelo en vivo en Google Play y Apple App Stores
Paso 3. Publica tu aplicación

Empiece a crear con Appily App Builder
Todas las funciones que necesita


Experiencia nativa
Ofrezca la experiencia nativa a los usuarios a través de su propia aplicación
monetización
Utilice admob y gane dinero con su aplicación
Perspectivas y análisis
Edita tu aplicación
No es necesario que vuelva a enviar la aplicación cada vez que realice cambios.
No se necesita codificación
No necesita habilidades de codificación para crear su propia aplicación móvil
ELIJA SUS CARACTERÍSTICAS
Utilice las estadísticas y los informes analíticos de su aplicación para optimizar la experiencia del usuario
¡Mensajes push, GPS y tantas otras funciones para elegir!

EMPIEZA A CREAR TU APLICACIÓN HOY
¿Tiene una idea de aplicación pero no puede codificar? Ahora, cree una aplicación sin tener que escribir una sola línea de código. Utilice la plataforma de arrastrar y soltar fácil de usar de Appily App Builder.
Obtenga todo lo que necesita para crear su aplicación móvil única. Esta plataforma de creación de aplicaciones móviles le permite crear y publicar su propia aplicación en minutos. Convierta la idea de su aplicación en realidad, ¡haga su aplicación ahora!
Cualquiera puede crear aplicaciones móviles nativas, potentes y profesionales con Appily App Builder utilizando una amplia variedad de funciones básicas y avanzadas que puede agregar a su aplicación. Incluso si nunca ha escrito una sola línea de código en su vida y necesita crear una aplicación para su pequeña empresa, puede diseñar una aplicación de la manera que desee con el creador de aplicaciones intuitivo de Appily App Builder.

¿Es usted una agencia que busca crear aplicaciones móviles?
Distribuidor de marca blanca
Cree aplicaciones para sus clientes, con todo el poder y la flexibilidad de la plataforma Appily App Builder. Utilice exactamente el mismo creador de aplicaciones que utilizan los clientes para crear miles de aplicaciones.


"Tengo que decirles que están haciendo un gran trabajo, hemos probado muchos creadores de aplicaciones, pero este es el mejor".
Equipo de DigiDevOne LDN
CONSTRUYENDO SU APLICACIÓN CON UN CREADOR DE APLICACIONES
VERSUS
DESARROLLO Y CODIFICACIÓN MANUAL DE SU APLICACIÓN
Administre su aplicación sin un desarrollador
Por lo general, un panel de administración de aplicaciones es una ocurrencia tardía para la mayoría de las personas que crean su aplicación desde cero. Normalmente, tendría que involucrar a un desarrollador para cada pequeño cambio que le gustaría hacer con su aplicación.
Con Appily App Builder, ese es un elemento central de la experiencia.
No te preocupes por infraestructuras complejas
La mayoría de la gente no se da cuenta de lo mucho que sucede detrás de escena de una aplicación móvil que funciona bien.
Cuando creas una aplicación desde cero, hay cientos de partes que debes considerar.
No querrá perder tiempo preocupándose por servidores, bases de datos, copias de seguridad y codificación.
Afortunadamente, Appily App Builder se encarga de todo, por lo que puedes concentrarte en lo más importante, tu negocio.
ahorre tiempo usando un creador de aplicaciones
Escribir código lleva tiempo. No siempre se puede acelerar el proyecto contratando más desarrolladores.
Por lo tanto, cuando tiene la oportunidad de aprovechar un creador de aplicaciones lleno de funciones y características predefinidas que ya se han probado, los privilegios de ahorro de tiempo y costo son una gran ventaja.
calidad y rapidez
Al crear una aplicación móvil, enfrenta las limitaciones de calidad, precio y velocidad.
Cuando crea una aplicación por su cuenta, puede ser difícil alinear los recursos de desarrollo de manera que obtenga la aplicación que desea dentro de su presupuesto. Con Appily App Builder, ahorra una cantidad significativa de tiempo al aprovechar las funciones existentes, lo que genera ahorros de costos de inmediato, y dado que miles de aplicaciones utilizan estas funciones, puede confiar en la calidad del desarrollo.
Frequently Asked Questions

Most powerful App Builder

iOS, Android & PWA
